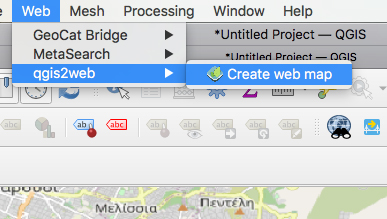
Currently, I am exploring the GIS, developing a web environment for exploring the changes in Attika land by creating a comparative online space for the ‘Karten von Attika’, the 19th-century maps of Attika land (Greece) and a contemporary one from the Openstreet map.
This is article presents the process of creating a web-map environment by using QGIS software and Geoserver. Maps are stored on Geoserver in an external virtual machine and the WMS layer is used to load in the QGIS project. When a website uses https protocol the virtual machine that hosts the Geoserver must be secured as well because https communicate and work properly with https thus Geoserver has to be connected over https.
Geoserver installation
GeoServer is an open-source server for sharing geospatial data,
it will be installed in an external virtual machine that has Ubuntu 20.04 O.S.
Run the virtual machine and update it with the latest apt packages.
sudo apt update
sudo apt upgrate
Geoserver requires Java. Install it by running
sudo apt install default-jdk -yCheck if Java is installed
java -version
and if the output is the below, Java is in the V.M
openjdk 11.0.17 2022-10-18
OpenJDK Runtime Environment (build 11.0.17+8-post-Ubuntu-1ubuntu222.04)
OpenJDK 64-Bit Server VM (build 11.0.17+8-post-Ubuntu-1ubuntu222.04, mixed mode, sharing)
Download the Geoserver 2.21
wget https://sourceforge.net/projects/geoserver/files/GeoServer/2.21.0/geoserver-2.21.0-bin.zip
Create a geoserver directory in /usr/share folder
mkdir /usr/share/geoserver
Extract the downloaded zip file in the above geoserver folder
unzip -d /usr/share/geoserver/geoserver-2.21.0-bin.zip
Create a geoserver user
sudo useradd -m -U -s /bin/false geoserver
Set this geoserver user as the ownership of the geoserver directory:
sudo chown -R geoserver:geoserver /usr/share/geoserver
Create a Systemd service file for GeoServer
sudo nano /usr/lib/systemd/system/geoserver.service
and write the bellow
[Unit]
Description=GeoServer Service
After=network.target

[Service]
Type=simple

User=geoserver
Group=geoserver

Environment="GEOSERVER_HOME=/usr/share/geoserver"

ExecStart=/usr/share/geoserver/bin/startup.sh
ExecStop=/usr/share/geoserver/bin/shutdown.sh

[Install]
WantedBy=multi-user.target
Reload the systemd daemon.
sudo systemctl daemon-reload
Start and enable the GeoServer at system reboot
sudo systemctl enable --now geoserver
Check the status of the GeoServer
sudo systemctl status geoserver
and if you see
Active: active (running)
ok!
Geoserver listens on port 8080 Type on you browser virtual machine’s IP address e.g xxx.xxx.xxx.xxx:8080/geoserver
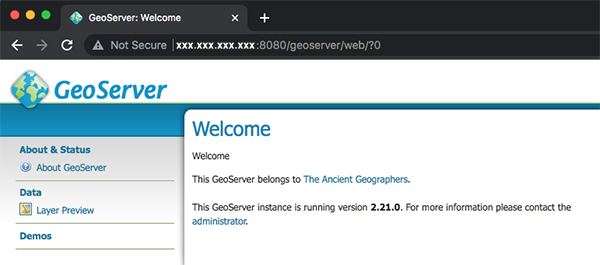
An SSL certificate enables an encrypted connection (HTTPS) There are many hosts and certificate authorities (CA), like Let’s Encrypt.
Prerequisites and requirements to install Let’s Encrypt SSL certificate.
1. Ubuntu 20.04 installed
2. Ability to manage your domain’s DNS records. Let’s Encrypt works with a fully registered domain name e.g example.com
3. Apache2 installed and active. An Apache2 virtual host configured for your website: example.com
DNS records
You have to log in to your domain provider and add DNS records for example.com
An A record with your_domain pointing to your server’s public IP address.
An A record with www.your_domain pointing to your server’s public IP address.
Apache HTTP Server
Installing Apache in Ubuntu 20.04
sudo apt install apache2
Start Apache
sudo service apache2 start
The html content of apache is stored inside the html folder that is in /var/www/
Create a new folder to store your webpage, e.g example (the same name as your domain name) and I created a simple index.html file inside this folder.
Apache has to serve this new content instead the default html one, a new virtual host has to be created.
The Apache’s virtual hosts are stored in /etc/apache2/sites-available
Navigate to this location
cd /etc/apache2/sites-available/
The default configuration is the 000-default.conf Instead of modifying the default configuration file, create a new one: example.conf
sudo nano /etc/apache2/sites-available/example.conf
and add the following.
<VirtualHost *:80>
ServerAdmin my@email.com
ServerName example.com
ServerAlias www.example.com
DocumentRoot /var/www/example
ErrorLog ${APACHE_LOG_DIR}/error.log
CustomLog ${APACHE_LOG_DIR}/access.log combined
</VirtualHost>
Enable this new configuration file by using the a2ensite tool:
sudo a2ensite example.conf
Disable the default configuration file : 000-default.conf
sudo a2dissite 000-default.conf
Test this for configuration errors
sudo apache2ctl configtest
You should receive the following output
Output
Syntax OK
Restart Apache
sudo systemctl restart apache2
Open a browser http://example.com:8080/geoserver to see Geoserver page
In this case Apache proxies http://example.com/geoserver requests to the http://example.com:8080/geoserver.
Backend server receives the request and sent the respond to the apache, which then generates the actual HTTP response back to the client.
Set up Apache as a reverse proxy server on Ubuntu 20.04, the following modules must be enabled by running the following commands:
sudo a2enmod proxy
sudo a2enmod proxy_http
The example.conf file has to be replaced by the following
The “ProxyPass” and “ProxyPassReverse” parameters are used to tell Apache how to proxy requests.
<VirtualHost *:80>
ServerAdmin my@e-mail.com
ServerName example.com
ServerAlias www.example.com
DocumentRoot /var/www/example
ErrorLog ${APACHE_LOG_DIR}/error.log
CustomLog ${APACHE_LOG_DIR}/access.log combined
 ProxyRequests On
 ProxyPass /geoserver/ http://example.com:8080/geoserver/
 ProxyPassReverse /geoserver/ http://example.com/geoserver/
 <Location /geoserver>
 Order allow,deny
 Allow from all
 </Location>
</VirtualHost>
Now you can type the address without port number http://example.com/geoserver
SSL Let’s Encrypt
Install the Certbot, a command-line utility that is used to get the certificate.
It helps to get and renew the SSL certificate when needed. It is available in the official APT package repository of Ubuntu.
Start the installation process of Certbot and python3-certbot-apache.
sudo apt install certbot python3-certbot-apache
Allow HTTPS traffic the default and pre-installed UFW firewall must be enabled to modify the firewall rules.
Check UFW firewall
sudo ufw status
It will show all the rules running if there are any.
If the status is inactive, enable the ufw utility using the command:
sudo ufw enable
Check the status again
Allow the Apache Full by running the below command
sudo ufw allow 'Apache Full'
Check the status of UFW again to verify the new configuration
sudo ufw status
and see
Apache Full Allow Anywhere
Apache Full(v6) Allow Anywhere
Get the Let’s Encrypt SSL certificate
Get the SSL certificate using the Certbot by typing the command given below:
sudo certbot --apache -d example.com -d www.example.com
The execution of the above command will prompt a couple of questions, so read them carefully and answer accordingly as per your requirements and needs.
Handling maps to Geoserver, the GeoCat Bridge plugin
When your map project has been completed, maps are ready to be uploaded on the Geoserver.
The GeoCat Bridge plugin easily publishes data and metadata from QGIS to Geoserver.
Go to QGOS project Plugins –> ‘Manage and Install Plugins’ 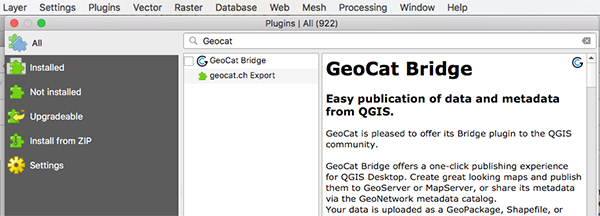 Create a new Geoserver
Give a name,
type its address: https://examples.com/geoserver
Requires authentication and the default login values of Geoserver is username: admin and password geoserver
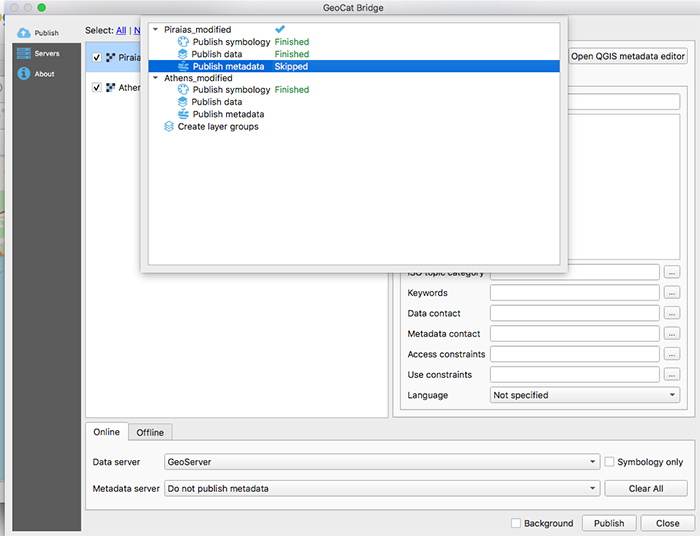
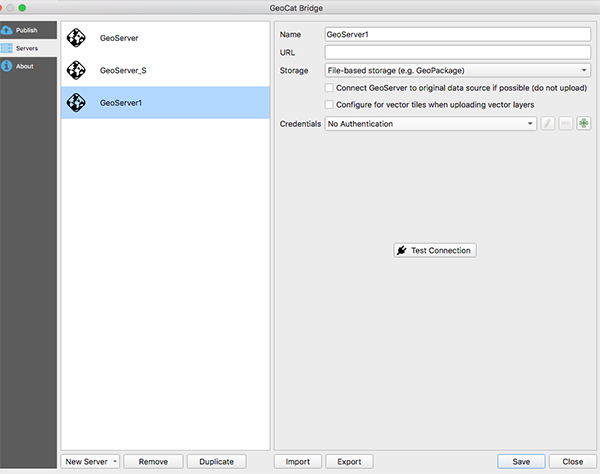 When the server is ready click publish tab
Now you can create a new QGIS project and load the maps from the Geoserever.
Go to –> Layer –>Add Layer –> Add WMS/WMTS Layer …
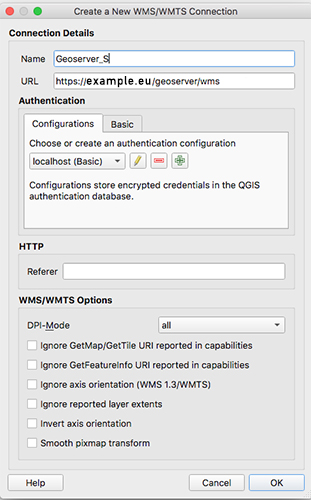 Click ok
Connect with the Geoserver and when a connection is established you can select the map file that you want to load on the WMS/WMTS Layer
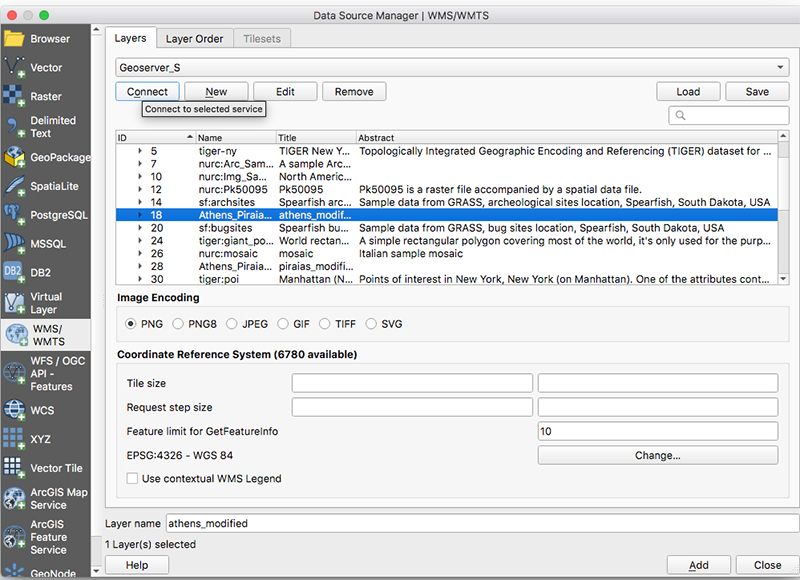
Click add
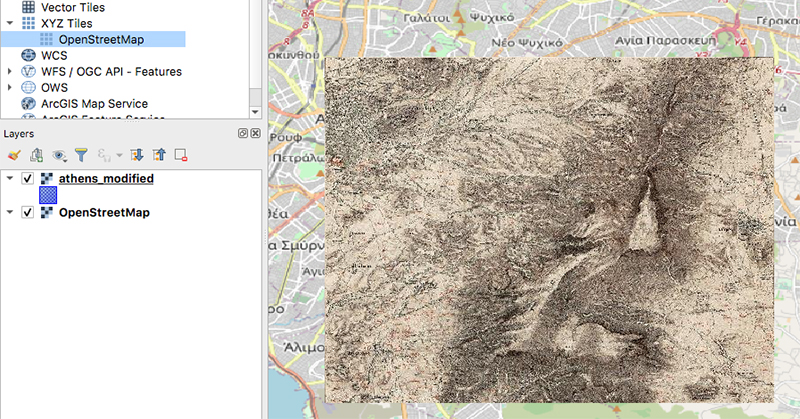
The qgis2web plugin, creating a web environment
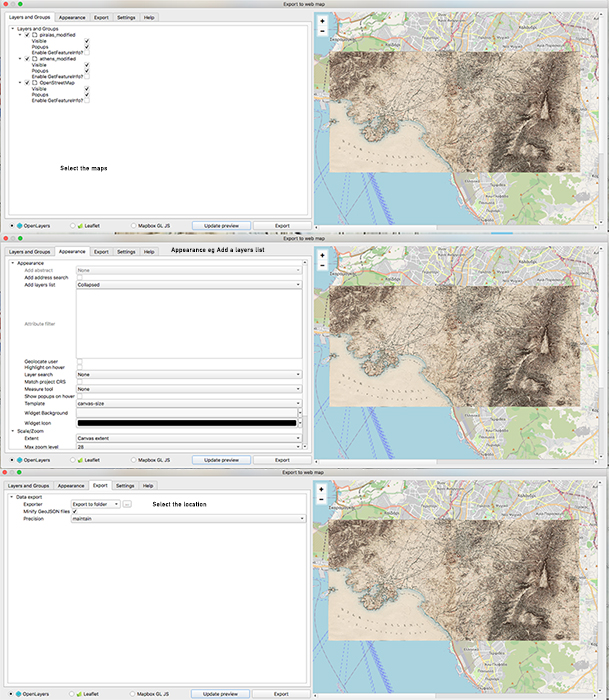
Webmap environment can be easily created with the qgis2web plugin that exports to an OpenLayers or Leaflet webmap from your current QGIS project.
When done click export
This exports a whole environment in a folder: qgis2web_the_timestamp, (the_timestamp: = the current time of this export)
When the project’s development is completed, it can be loaded on your web server.

